Selecting the right finish for your bathroom surfaces is one of the most critical steps in any remodel. Your choice directly affects durability, safety, and upkeep – not just visual appeal. With today’s broad range of materials, sizes, and finishes, understanding the technical side of tile specification is key to achieving both design precision and performance reliability.
Mercer Island homeowners typically aim for a blend of understated elegance and proven functionality. Local specialists favor solutions that respect the island’s modern architectural tone while aligning with recognized standards such as ANSI, TCNA, and PEI classifications. Relying on certified installers helps avoid frequent issues – uneven surfaces, inadequate waterproofing, or materials with insufficient slip resistance (COF).
This guide provides structured insights and practical bathroom remodel tips from Mercer Island professionals helping you make informed design and material choices for a space that’s both refined and built to last.
Understand Your Space: Planning Before Tiling
Every successful remodel starts with clear planning. Measure your space carefully to determine how much tile you’ll need for floors, walls, and showers. Accurate estimates reduce waste and ensure a precise layout.
Lighting and color play a critical role. Lighter tiles visually expand small bathrooms, while darker tones add depth and contrast. For those seeking the best tiles for small bathrooms, glossy or reflective finishes help maximize natural light.
Your budget should include not just the tiles themselves but also grout, mortar, underlayment, and waterproofing. Investing in high-quality tile materials saves money long term and simplifies maintenance.
Types of Tiles: Choosing the Right Material
The material you select directly affects durability, maintenance, and overall aesthetics. Here’s a breakdown of common bathroom surface options:
- Ceramic and Porcelain
These are the most recommended for bathrooms due to their durability, water resistance, and easy care. Porcelain, being denser and less absorbent, works particularly well in wet zones such as showers. Check ANSI/ASTM or PEI ratings for wear and slip resistance. The new ANSI A108/A118/A136.1:2024 standards highlight proper substrate prep, mortar choice, and bonding for optimal installation.
- Natural Stone
Marble, travertine, or slate provide premium looks but require sealing and regular upkeep. Without proper care, they may stain or etch, so plan for maintenance from the start.
- Glass and Metal
Ideal for accents, feature walls, or decorative inlays. Glass reflects light, while metal adds a modern touch. Ensure proper slip-resistance in wet areas.
- Mosaics
Perfect for intricate patterns or adding texture in small areas or niches. Smaller pieces create more grout lines, improving traction when installed correctly.
Choosing the right material balances practical use, aesthetic goals, and performance, resulting in a space that is both beautiful and durable.
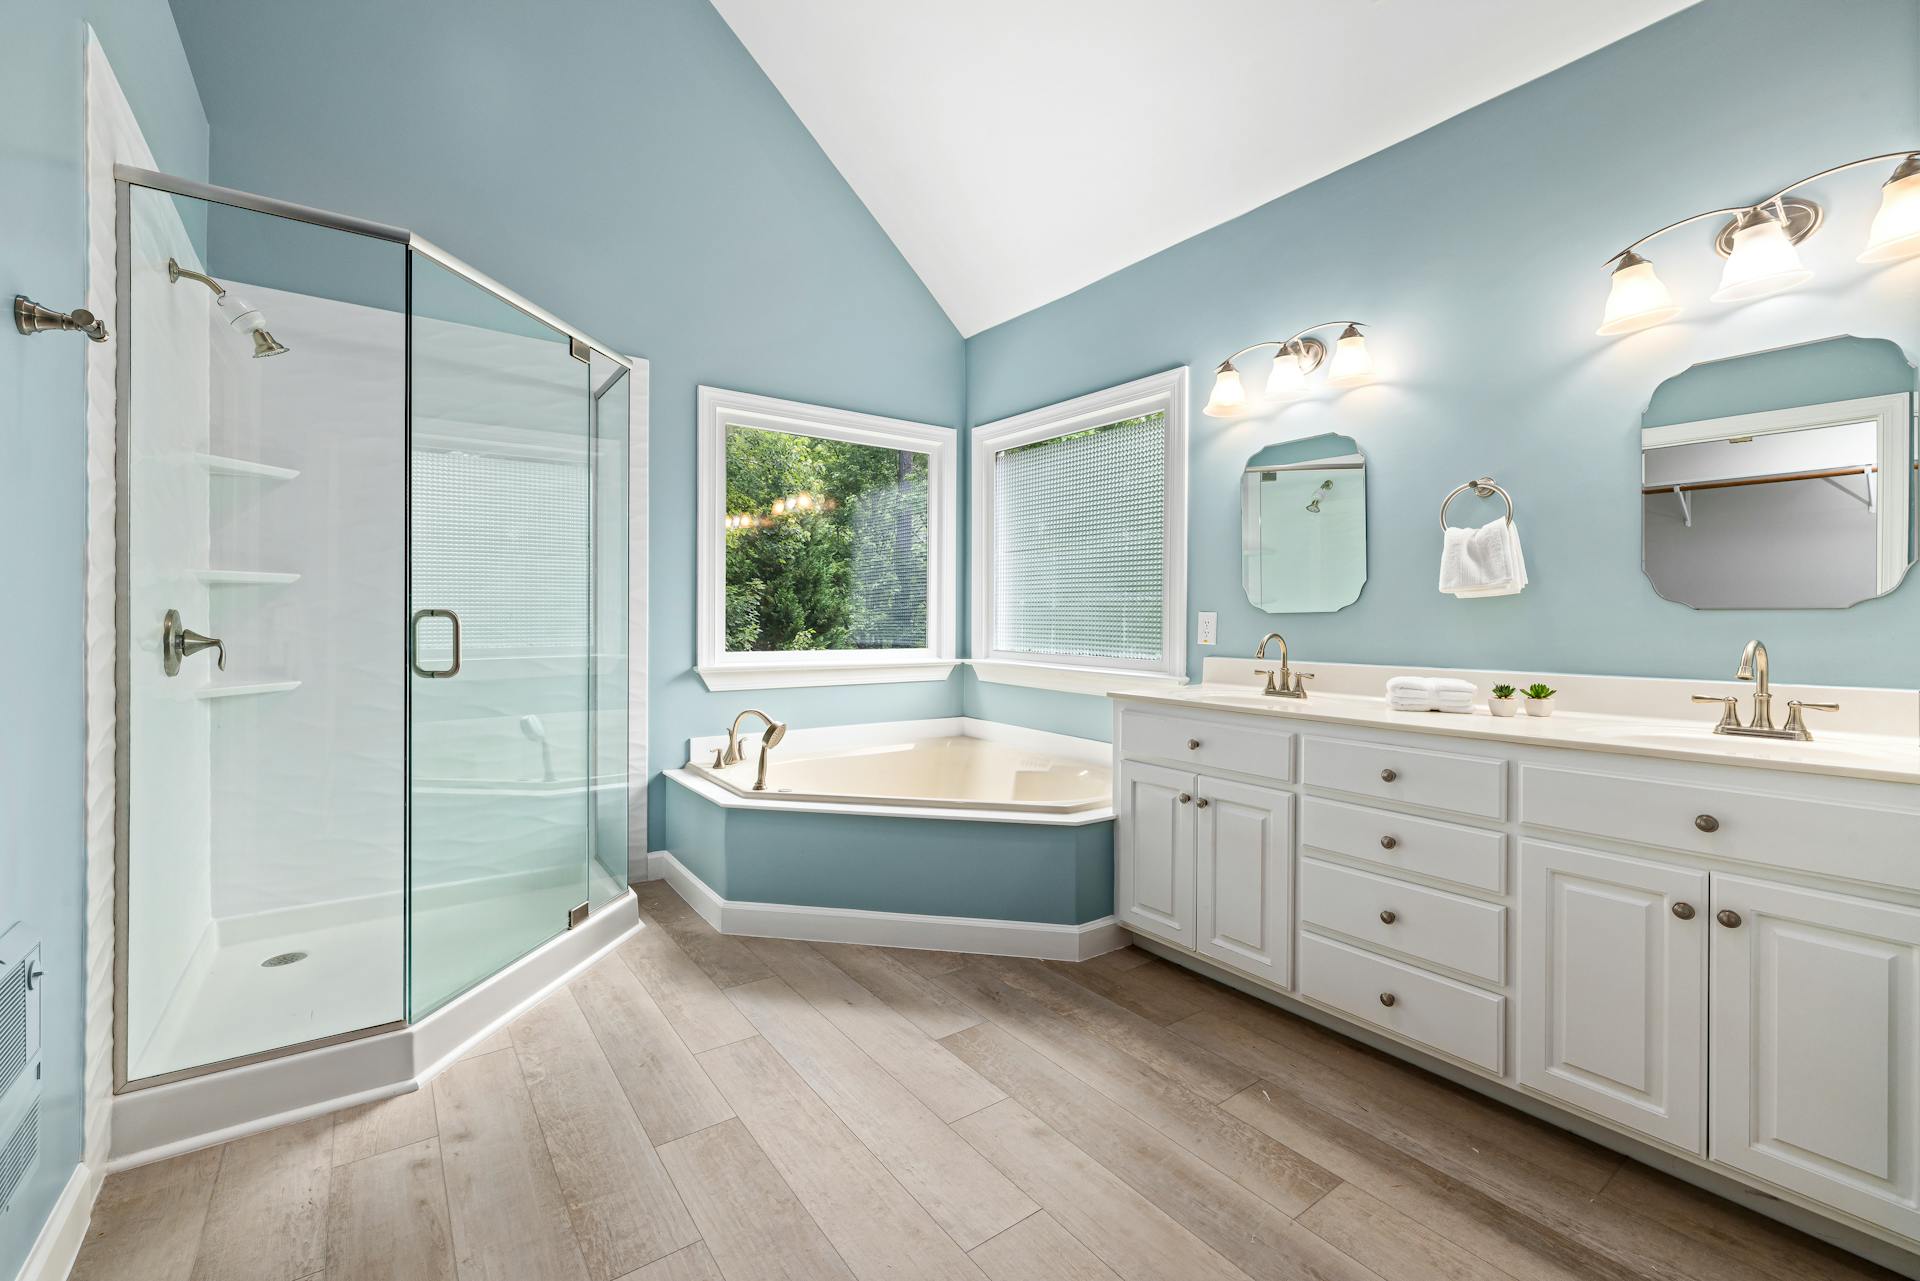
Color and Pattern Selection: Enhancing Aesthetics
Color and pattern choices are among the most expressive aspects of a bathroom remodel, but poor decisions can compromise coherence or visual balance.
- Neutral Tones
Whites, grays, taupes, and off-whites are timeless and versatile. In compact bathrooms, they expand perception of space and pair well with varied fixtures and finishes.
- Bold Colors and Patterns
Rich tones – navy, emerald, terracotta – can inject personality. Use them sparingly as accent walls, borders, or feature niches to avoid overpowering the visual field, especially where lighting is limited.
- Popular Patterns
Layouts like herringbone, chevron, and subway tile remain in favor among Mercer Island designers. When using these patterns, maintain strict alignment, consistent grout joints, and deliberate orientation to support visual flow and avoid misalignment. Poor offsets, over-large jumps in pattern, or inconsistent lines detract from the finish. (ANSI A108.02 addresses acceptable offsets and lippage tolerances in tile layouts.)
By mixing neutrals and judicious accents, complimented with well-planned patterns, you can deliver both style and coherence while respecting tile selection for bathroom principles.
Tile Size and Layout: Maximizing Space
Tile size and layout are not merely aesthetic decisions – they influence cleaning difficulty, visual continuity, and structural behavior.
- Large-Format Tiles
In small bathrooms, larger tiles reduce grout lines for a seamless, visually expanded surface and easier cleaning. They require precise subfloor leveling to prevent uneven edges.
- Small Tiles / Mosaics
Ideal for curved surfaces or detailed patterns. More grout lines improve traction but need careful alignment to maintain symmetry and cleanliness.
- Layout Considerations
Aligned grout lines, intentional symmetry, and thoughtful orientation guide the eye and enhance flow. In wet zones, tile direction should complement lighting, shower placement, and focal points.
Correct combination of tile size and layout supports a refined visual effect, enhances safety, and optimizes bathroom tile ideas into real-world execution.
Maintenance and Durability: Long-Term Considerations
Long-term performance is crucial; even the best aesthetic choices falter if the materials underperform.
- Easy-to-Clean Surfaces
Choose glazed porcelain or smooth ceramic surfaces that resist grime and water penetration. These simplify daily cleaning. Tiles with high PEI ratings can better endure repeated use without wear or deterioration.
- Durability
Look for tiles that resist scratching, moisture intrusion, and impact. Dense porcelain is strong in these areas; natural stone often needs sealing and periodic upkeep. Verify ANSI/TCNA compliance to measure wear resistance and structural reliability.
- Grout Selection
Darker grout shades help conceal staining over time. Epoxy grout offers superior resistance to moisture, mold, and discoloration compared to standard cementitious grout. Maintaining joint width consistency and periodic resealing (if needed) contributes to a durable result.
Prioritizing maintenance and durability reduces the life-cycle cost of your remodel and preserves the quality of the installation for decades.
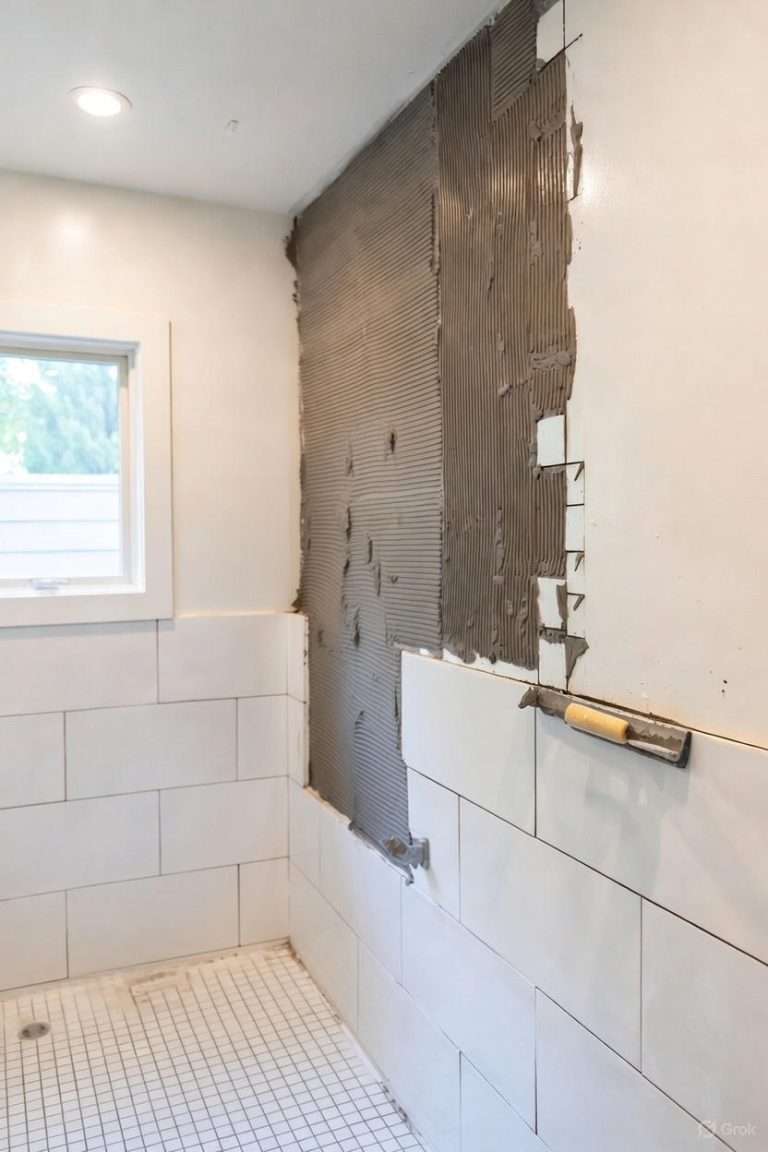
Professional Installation: Ensuring Quality Workmanship
Even the finest tile cannot perform to potential if it is installed poorly. Meticulous installation is essential for longevity, safety, and flawless aesthetics.
- Hiring Experts
Experienced local professionals understand Mercer Island’s climate, substrate conditions, and moisture challenges. They follow guidelines such as ANSI A108 and TCNA methods, correctly apply waterproof membranes like Schluter®-KERDI or uncoupling membranes (e.g. DITRA), and manage expansion joints per profile requirements.
- DIY Considerations
If you choose DIY, ensure you have the right tools and knowledge. Substrate preparation, precise leveling, correct mortar (meeting ANSI A118 standards), cure times, and alignment are non-negotiable. Many tile issues stem from oversight at this stage.
- Inspection
Upon completion, confirm that grout joints are uniform, tiles are firmly bonded (no hollow spots), slopes in wet areas are correct, and sealants are applied at transitions. The goal is to satisfy ANSI A108.5 coverage standards (80% for dry installations, 95% for wet areas) to ensure full mortar support.
Whether professional or DIY, adherence to industry standards and rigorous quality control ensures the tile system performs reliably for years.
Expert Tips from Mercer Island Designers
Mercer Island designers combine regional insight with technical rigor to deliver refined yet resilient bathrooms.
- Local Trends
Clean lines, natural textures, and balanced color palettes dominate. A typical approach might pair neutral porcelain tile with subtle glass or stone accents. Lighting design, reflective surfaces, and careful tile transitions are emphasized to enhance spatial perception, especially in smaller bathrooms.
- Sustainability
Eco-conscious choices are increasingly important. Many clients prefer tiles made from recycled content, low-VOC adhesives, or manufacturers with sustainability certifications (e.g. GreenGuard). These decisions align with healthier indoor environments and longer-term value.
- Personalization
Use custom mosaics, accent niches, or textured finishes to make the bathroom uniquely yours. Integration of personality must never compromise technical integrity – layout, waterproofing, and material compatibility remain paramount.
By blending technical discipline with creative nuance, designers on Mercer Island help homeowners realize bathrooms that are both functional, durable, and reflective of personal style.
Thoughtful bathroom remodel tips begin and end with deliberate tile selection. Every decision – from material and pattern to installation and maintenance – affects the longevity, safety, and aesthetic quality of your space. By exploring rich bathroom tile ideas, evaluating performance as part of your tile selection for bathroom process, and relying on professional standards like ANSI and TCNA, you create a remodel rooted in craftsmanship.
Whether updating a compact guest bath or designing a master spa, consulting experienced professionals ensures that substrate prep, waterproofing, and tile alignment meet the demands of a long life. After all, how to choose bathroom tile isn’t just about style – it’s about engineering, durability, and expert execution. Invest in that foundation, and you’ll achieve a bathroom built to perform beautifully for years to come.
FAQ
1. What is the best type of tile for a bathroom remodel?
Porcelain tile is generally the top choice for bathroom remodels. It’s denser, less porous, and more durable than ceramic. Porcelain meets high ANSI A137.1 standards for water absorption and can handle wet zones like showers. For walls or decorative surfaces, glazed ceramic and glass tiles offer visual versatility without compromising performance.
2. How do I choose the right tile size for my bathroom?
Tile size depends on the bathroom’s layout and proportion. Large-format tiles reduce grout lines and visually expand small rooms, while smaller tiles (like mosaics) add traction and flexibility around slopes or curved surfaces. For best results, ensure substrate flatness within 1/8″ in 10 ft per TCNA Handbook guidelines to prevent lippage with large tiles.
3. What is the most durable bathroom tile material?
Porcelain is the most durable due to its high density, scratch resistance, and low moisture absorption (<0.5%). It outperforms most natural stones in long-term wear tests. To ensure longevity, verify PEI ratings (Porcelain Enamel Institute) and check that the tile meets ANSI A137.1 durability classifications.
4. How can I make my bathroom tile easier to maintain?
Choose smooth, non-porous tiles (such as glazed porcelain) and pair them with epoxy grout, which resists mold and discoloration. Avoid textured finishes on floors if maintenance simplicity is a priority. Following TCNA’s maintenance guidelines – including proper sealing where needed – will extend the lifespan of your tile installation.
5. Is natural stone a good option for bathrooms?
Yes, but it requires consistent maintenance. Stone tiles like marble or travertine must be sealed regularly to prevent staining and etching from water or cleaning products. They perform best in low-traffic or accent areas. Always use a waterproof membrane system, such as Schluter®-KERDI, to protect substrates behind natural stone installations.